

Introduction
If you’re diving into the world of digital content creation, aiming for that crystal-clear audio that makes every listener hang on to your every word, then let me introduce you to your new best friend: the Blue Yeti microphone! This gem is the go-to for podcasters, streamers, musicians, and all sorts of audio magicians out there.
Why, you ask? Well, it’s like the Swiss Army knife of microphones – offering top-notch quality, versatility, and won’t make your wallet cry for mercy. But the Blue Yeti isn’t just about making things sound amazing; it’s also about making your life easier.
Imagine being able to bring your audio dreams to life with just a plug-and-play setup. Yep, it’s that simple. So, whether you’re narrating the next big podcast, streaming your epic gaming sessions, crafting some musical magic, or just needing to sound like a pro in your online meetings, the Blue Yeti has got your back!
History and Development
From the very beginning, Blue Yeti microphone has just a simple mission: to provide high-quality audio and accessible recording solutions to its users. Since its inception, the Yeti has evolved, embodying the aspirations of its creators and the needs of its users, becoming a staple on desks around the globe.
Key Features and Specifications of Blue Yeti Microphone
The Blue Yeti microphone is not just another piece of tech—it’s a gateway to crystal-clear audio for content creators worldwide. Let’s dive deeper into its key features and specifications that make it a standout choice.
- Multi-pattern Selection: The versatility of the Blue Yeti is exemplified by its multi-pattern capability, offering four distinct recording patterns:
- Cardioid Mode: Perfect for podcasts, vocal performances, voiceovers, and streaming. It records sound sources that are directly in front of the microphone, delivering rich, full-bodied sound.
- Bidirectional Mode: Captures audio from both the front and the rear of the microphone. Ideal for interviews, this setting allows two people to use the microphone simultaneously.
- Omnidirectional Mode: Picks up sound equally from all around the microphone. It’s great for recording a live session with multiple participants or capturing ambient sounds.
- Stereo Mode: Uses both the left and right channels to capture a wide, realistic sound image. Best suited for acoustic guitar recordings or choir performances, where capturing the spatial dynamics is key.
- On-mic Controls: The Blue Yeti is designed with user control in mind. Its on-mic controls include:
- Gain Control: Allows for the adjustment of the microphone’s sensitivity. This lets you increase or decrease the volume of the audio being captured without needing to fiddle with your computer’s settings.
- Mute Button: A handy feature for live recordings or streams, providing the ability to quickly mute the microphone without any audible click.
- Zero-latency Headphone Output: With a headphone jack directly on the microphone, users can listen to their recordings in real-time, without the delay that can occur with audio playback through a computer. This feature is crucial for monitoring audio quality during recording sessions.
- USB Connectivity: The simplicity of the Blue Yeti’s USB plug-and-play capability cannot be overstated. It eliminates the need for external sound cards or audio interfaces, making it a go-to option for creators who value efficiency and ease of setup.
- Tri-capsule Array: At the heart of the Yeti’s audio fidelity is its tri-capsule technology. This setup utilizes three condenser capsules to capture everything from the quietest whisper to the loudest instruments with clarity.
- Adjustable Stand: The microphone comes with a desktop stand that can be adjusted to find the ideal recording angle. This flexibility is crucial for capturing the best sound quality in diverse recording environments.
Variants of Blue Yeti Microphone
The Blue Yeti family consists of several models, each designed to cater to different needs and preferences while maintaining the core attributes that make the Yeti so beloved.
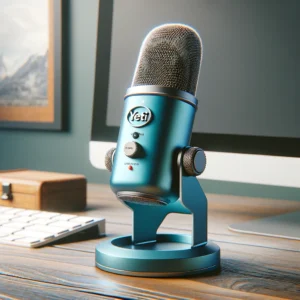
1) Yeti
The original model that set the standard for quality and versatility. It’s the perfect all-rounder for creators who need a reliable microphone capable of handling a wide range of recording scenarios.

2) Yeti Nano
A compact version of the original, the Yeti Nano is designed for creators with limited desk space or those who require a portable solution. Despite its smaller size, it still offers impeccable sound quality and the convenience of plug-and-play USB connectivity.
3) Yeti X
For those seeking more control and higher audio fidelity, the Yeti X is a premium offering with a four-capsule condenser array for unparalleled sonic performance. It also features advanced on-mic LED metering, so you can visually monitor your voice level in real-time, and custom Blue VO!CE software for professional vocal effects and presets.
4) Yeti Pro
The Pro model combines the features of the Yeti with high-resolution audio recording capabilities up to 24-bit/192 kHz and XLR output. It’s tailored for professional studios and recording setups, offering the ultimate in versatility and sound quality.
Each variant embodies the essence of what makes the Blue Yeti a favorite among content creators: unparalleled ease of use, flexibility, and exceptional sound quality. Whether you’re just starting out or are a seasoned professional, there’s a Yeti microphone tailored to your needs, ensuring your voice is heard loud and clear, exactly as you intend it to be.
How to Setup Your Blue Yeti?
Setting up the Blue Yeti microphone for the first time might seem daunting, but it’s a straightforward process that unlocks the full potential of this versatile tool. Here’s a step-by-step guide to ensure you’re up and recording with minimal fuss and maximum quality.
1) Unboxing and Initial Setup
- Unbox Your Microphone: Carefully remove the Blue Yeti and its stand from the packaging. You’ll find a USB cable included, which is your key to connecting the microphone to your computer.
- Secure the Microphone on Its Stand: Attach the Blue Yeti to its stand by screwing it into place if it isn’t already assembled. This stand provides stability and flexibility in microphone positioning.
- Connect to Your Computer: Plug the USB cable into the Blue Yeti and then connect it to an available USB port on your computer. The Blue Yeti is plug-and-play, meaning it doesn’t require additional drivers to start working on most modern operating systems.
- Software Configuration: Select Your Blue Yeti as the Default Recording Device: Go to your computer’s sound settings. On Windows, you’ll find this in the Control Panel under “Sound.” On a Mac, go to “System Preferences” and then “Sound.” Select the Blue Yeti as the default device for input.
- Adjust the Gain Control: On the microphone itself, you’ll find a gain control knob. This controls the sensitivity of the microphone. Start with it set to the middle and adjust according to your environment and speaking volume.
2) Tips for Optimal Placement and Angle
- For Podcasting and Voiceovers: Use the cardioid mode and place the microphone slightly off-axis from your mouth to avoid plosives. A pop filter placed between you and the microphone can also help minimize these sounds.
- For Interviews: Switch to bidirectional mode if you’re recording with a guest sitting across from you. Place the Yeti midway between you two, ensuring both voices are captured equally.
- For Group Discussions: The omnidirectional mode captures sound from all around the microphone. Place it centrally among the participants for uniform sound capture.
- For Musical Recordings: If recording an instrument or a mix of vocals and instruments, experiment with stereo or omnidirectional modes for a rich, full-bodied sound capture. Placement depends on the sound source; for a guitar, for instance, aim the microphone at the 12th fret from about 6-12 inches away.
Setting up your Blue Yeti microphone correctly is the first step toward professional-quality audio recordings. By following these detailed steps and adjusting the setup based on your specific recording situation, you’ll be able to capture crisp, clear sound that can elevate any project. Remember, the key to great audio lies not just in having a great microphone like the Blue Yeti, but in knowing how to use it effectively. Experiment with different settings and placements to find what works best for your unique voice and recording environment. Happy recording!
How To Achieve The Best Sound Quality With The Blue Yeti Microphone
Achieving stellar sound quality transcends simply owning a high-grade microphone; it requires a nuanced understanding of its features and how to leverage them for your specific needs. The Blue Yeti microphone, with its versatility and superior design, offers a plethora of options to enhance your audio recordings, whether for podcasts, music, interviews, or any other creative endeavor.
1) Selecting the Right Pattern Mode
The Blue Yeti microphone shines with its multi-pattern capabilities, allowing users to tailor their recording setups to match the intricacies of various scenarios:
- Cardioid Mode: Ideal for podcasts, streaming, or any scenario where the sound source is directly in front of the microphone. It captures sound with precision and warmth, making your voice rich and clear while minimizing background noise.
- Bidirectional Mode: Perfect for interviews, this setting picks up sounds from both the front and the back of the microphone. Imagine sitting across from your guest, each voice captured with clarity and balance.
- Omnidirectional Mode: When you want to capture the essence of a room, whether it’s for a roundtable discussion, a band recording, or ambient sounds, this mode picks up audio from all directions, ensuring no sound goes unheard.
- Stereo Mode: For musicians or those looking to create a more immersive audio experience, stereo mode offers a realistic soundstage that captures the movement and depth of sounds, ideal for detailed musical performances or dynamic storytelling.
2) Adjusting Gain Levels and Utilizing Accessories
Gain control is pivotal in managing the sensitivity of your microphone. A high gain level might capture more detail but can also introduce unwanted background noise or distortion. Conversely, too low a gain might render your audio too quiet. Striking the right balance is key; start low and gradually increase until you achieve the desired clarity without peaking.
External pop filters and shock mounts are invaluable tools for enhancing sound quality. Pop filters mitigate plosive sounds (“p”, “b”, and “t” sounds) that can cause peaks in your audio, while shock mounts absorb vibrations, preventing rumbles from movement or environmental noise from infiltrating your recordings.
3) Minimizing Background Noise and Echo
Creating an optimal recording environment is as crucial as the equipment you use. To minimize background noise and echo:
- Choose a Quiet Room: Start with a space that inherently has minimal noise. Soft furnishings and carpeted floors can naturally dampen sound reflections.
- Use Acoustic Treatments: If possible, invest in acoustic panels or foam to treat your room, especially if you’re dealing with echo issues. These materials absorb sound, preventing it from bouncing back into your microphone.
- Strategic Microphone Placement: Position your Blue Yeti and yourself thoughtfully within the space. Avoid direct paths between hard surfaces to reduce echo. Sometimes, simply changing the angle or location of your microphone can significantly improve sound quality.
By understanding and applying these techniques, you can significantly enhance the audio quality of your recordings with the Blue Yeti microphone.
Beyond Podcasting
The Blue Yeti microphone excels in various applications:
Streaming and Gaming
Delivers clear, professional audio quality that elevates the gaming experience for both the streamer and their audience.
Voiceovers and Dubbing
Offers the clarity and versatility needed for professional-grade voice work.
Musical Recordings
Captures the nuanced sounds of instruments and vocals with ease.
Online Meetings and Webinars
Ensures you’re heard clearly in any professional setting.
Comparison with Other Microphones
When compared to other microphones in its price range, the Blue Yeti stands out for its versatility, ease of use, and the sheer quality of audio it can produce. While there are many great microphones out there, few offer the same blend of features and performance that has made the Yeti a go-to for so many.
Troubleshooting Common Issues
Common problems like software compatibility, static noise, or connectivity issues are typically easy to resolve with a bit of troubleshooting. The Blue Yeti’s robust support community and extensive online resources provide helpful guidance for overcoming these hurdles.
Care and Maintenance
1) Best Practices for Maintaining the Blue Yeti
- Regular Inspection and Cleaning: Periodically inspect your Blue Yeti for dust, debris, or any signs of wear and tear. A clean microphone ensures optimal performance. Use a soft, dry cloth to gently wipe the body of the microphone and its stand. Avoid using wet cleaners directly on the microphone to prevent any potential damage to its electronic components.
- Proper Handling: Always handle your Blue Yeti with care. When adjusting its position, make sure to hold it by the base rather than the microphone body to minimize the risk of accidental drops or damage. Also, when connecting or disconnecting cables, do so gently to avoid damaging the ports.
- Avoid Extreme Conditions: Keep your microphone away from extreme temperatures and humidity levels, as these conditions can harm its components. Exposure to sunlight for extended periods or storing in damp environments can lead to deterioration of the microphone’s materials and electronics.
- Use a Pop Filter or Windscreen: Attaching a pop filter or windscreen can significantly reduce the impact of plosive sounds (like “p” or “b” sounds) and prevent saliva from reaching the microphone element. This not only improves audio quality but also protects the microphone from moisture damage over time.
- Regular Firmware Updates: For models like the Yeti X that come with software support, ensure you regularly check for and install firmware updates. These updates can enhance the microphone’s functionality, introduce new features, and fix any known issues.
2) Cleaning and Storage Tips
- Cleaning the Microphone: For routine cleaning, use a soft, dry brush or a can of compressed air to gently remove dust from the grille and body. For more thorough cleaning, lightly dampen a microfiber cloth with water or isopropyl alcohol and gently wipe the surface. Ensure the cloth is not too wet to avoid moisture seeping into the microphone.
- Storing Your Microphone: When not in use, store your Blue Yeti in a dry, cool place. If possible, use a microphone cover or store it in a case to protect it from dust and accidental damage. Avoid placing heavy objects on top of the microphone or its cables to prevent bending or warping.
- Cable Care: Detach the USB cable when not in use, especially if storing the microphone for an extended period. This prevents undue stress on the microphone and cable connectors. Coil the cable loosely to avoid kinks and potential wire damage, ensuring its longevity and functionality.
By following these care and maintenance tips, you can significantly extend the life of your Blue Yeti microphone, ensuring it continues to deliver high-quality audio for all your recording needs.
Conclusion
The Blue Yeti microphone embodies the intersection of quality, versatility, and accessibility. Whether you’re just starting your content creation journey or looking to upgrade your audio setup, the Yeti offers a solution that’s hard to beat. Its range of patterns, ease of use, and robust build quality make it a worthy investment for anyone serious about audio quality.